Tuesday, July 11, 2017
Sailing with Jane
As if one needed a reason for a hobby. There is nothing better than a "dad date" and spending time with my favorite girl.
Season 2 – Summer 2017
Here are a few pictures of Puffin on the lakes and waterways around southeast Wisconsin the summer of 2017...
 |
| At the McKinley Marina boat launch |
I continue to make adjustments to the rig and layout of the boat. I decided to move the battery and charger assembly into the front compartment of the boat to provide a little extra weight in the bow section as well as to get it out of the way of the cockpit, which is already a little cramped as it is.
 |
| Dead Calm. Sunrise over an "oily", foggy Lake Michigan |
 |
| Placid sail on Lake Michigan. Winds 5-10. Me at the tiller, sister-in-law Ann on the selfie. |
 |
| Navigator perspective of the Milwaukee skyline. Nice boat. Nice lake. Nice city. |
 |
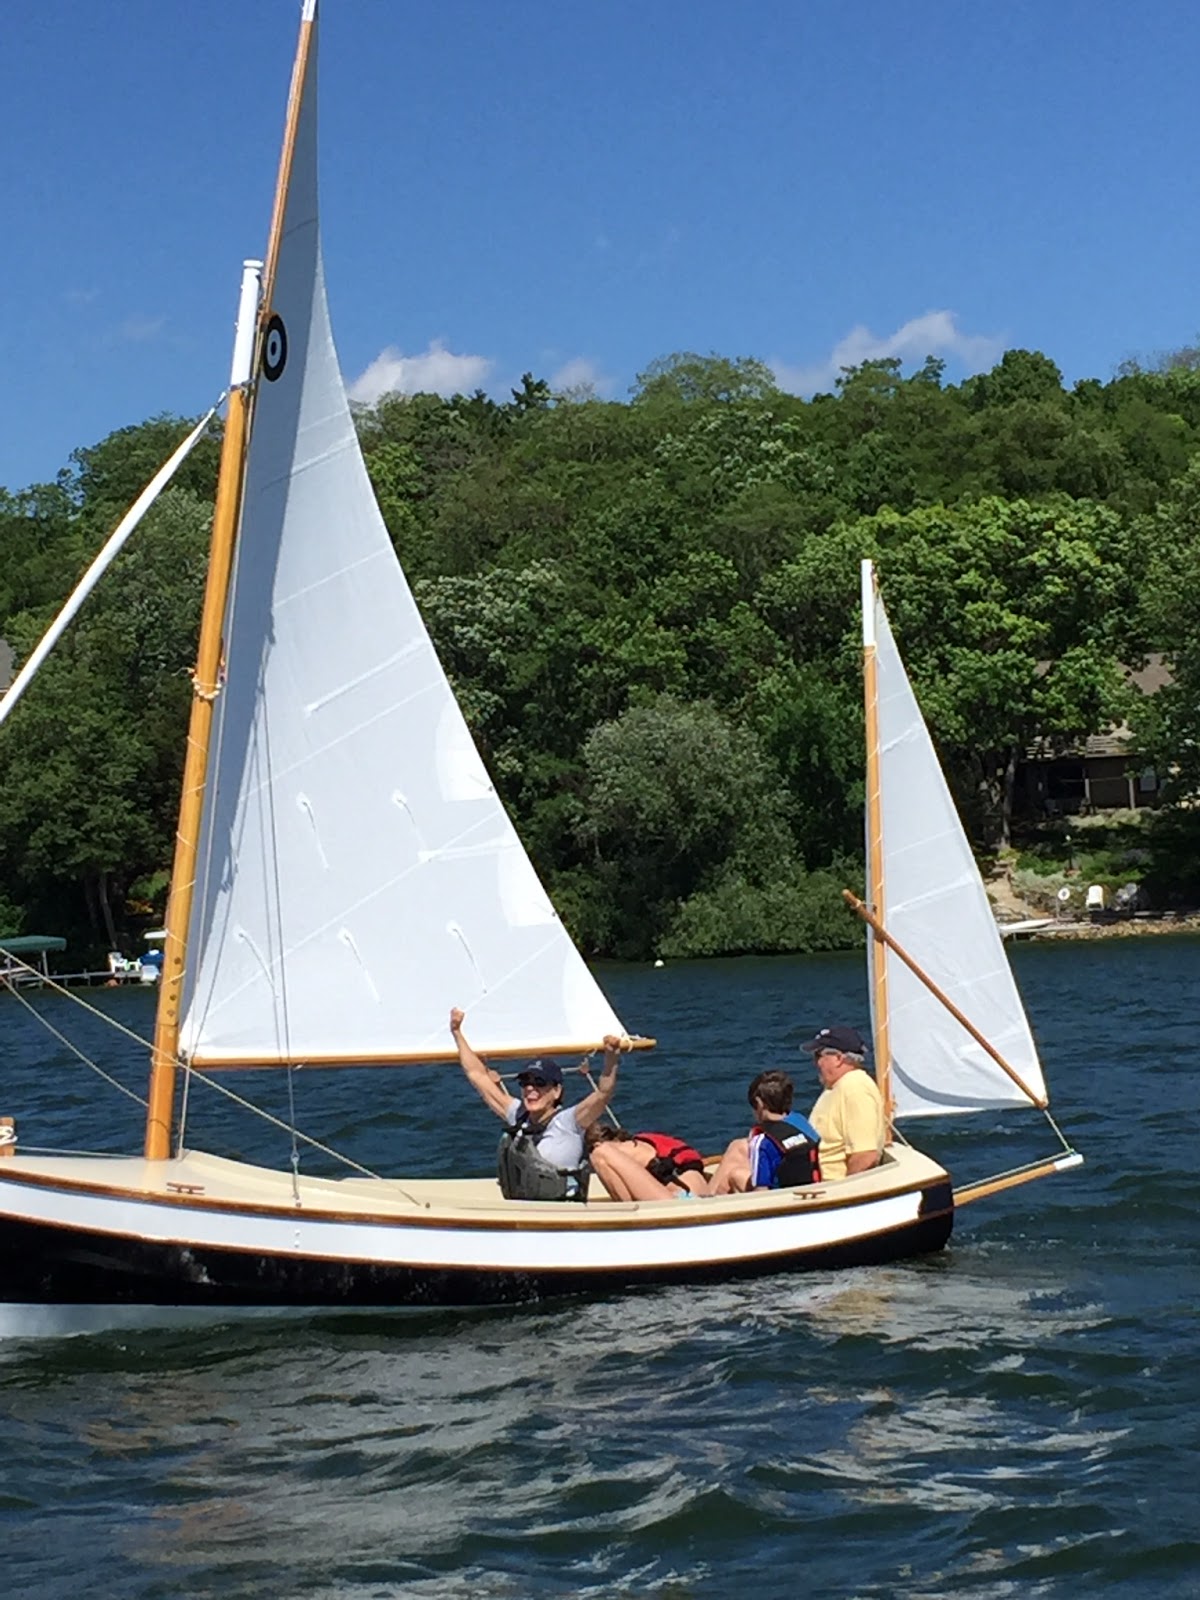
| Puffin triumphant. |
 | |
|
 |
| Ann and Karla cooling off with "wife-beaters". |
 |
| Pano of NML building, Calatrava, and Harbor House. Inner Harbor, Milwaukee. |
 |
| Anchored off Harbor House in Milwaukee...great place to enjoy a beer. |
 |
| Calatrava Milwaukee Art Museum. |
 |
| Karla – Lazing on a Sunday afternoon... |
 |
| Daughter Jane handing the tiller and the mainsheet. |
Sunday, July 17, 2016
After her first 5 outings...
I think it's worth offering a few reflections based on our first few outings.
First off, as many have noted before me, there is nothing quite like the excitement and sense of pride in launching and sailing a boat the one has made with ones own hands. To the extent practically possible, I made EVERYTHING on this boat. Every single bit of it was made by me. That gives me a great sense of accomplishment. There are few things in my life that I can look back on with as much of a sense of unbridled pride.
Puffin is not perfect, but then again, nothing in my life is. But she fulfills her purpose wonderfully. All the blemishes and imperfections simply vanish when you see her tied up to a dock, heeling over on a broad reach. She elicits admiring glances and comments wherever we go. Yesterday, my wife and I knocked around the inner harbor of Milwaukee on a day that was custom-tailored for sailing. It was great fun to have these huge 30' and 40', high-tech racing sailboats steer closer just to get a closer view of this little dinghy.
Reflecting on the project itself: when I undertook this commitment, I blithely thought I could knock it out in 5 or 6 months. I had no appreciation for the amount of work it would take to build a boat from scratch. I had almost no tools and fewer skills. I learned a tremendous amount...mostly from internet contact with other builders. I honestly don't think I could have done this without YouTube, and the host of other internet resources that are available.
First off, as many have noted before me, there is nothing quite like the excitement and sense of pride in launching and sailing a boat the one has made with ones own hands. To the extent practically possible, I made EVERYTHING on this boat. Every single bit of it was made by me. That gives me a great sense of accomplishment. There are few things in my life that I can look back on with as much of a sense of unbridled pride.
 |
| Even my skeptical wife shows her excitement on launch day. |
 |
| 9 coats of spar varnish make for a shiny transom. Rudder checks and tiller are not yet complete at this point. |
Reflecting on the project itself: when I undertook this commitment, I blithely thought I could knock it out in 5 or 6 months. I had no appreciation for the amount of work it would take to build a boat from scratch. I had almost no tools and fewer skills. I learned a tremendous amount...mostly from internet contact with other builders. I honestly don't think I could have done this without YouTube, and the host of other internet resources that are available.
 |
| Lovely wooden blocks courtesy of Joel Bergen. These are made with lignum vitae sheaves, oiled elm cheeks, hand bent stainless steel straps, and brass pinning. These became one of my favorite things to make. In fact, I just keep making them, because they're fun. I have more blocks in my garage than I will ever use! |
How does Puffin sail? Give her 10-15kt breezes and this boat is fantastic. I'm still getting used to her ways, and every outing leaves me happier. She is very dry and very stable. I'm still working out how best to tack this boat. I've missed stays a few times, and wondering if it may be on account of mainsail twist on the gaff yard??
One of my favorite things is the hinged mainmast which allows me to rig/de-rig the boat in 10 minutes.
 |
| Stable and balanced? Puffin is self steering! I'm not a "small" guy. In this picture I'm standing on the seat. Although we didn't get a picture of it, I was up on top of the foredeck by the mainmast and felt very comfortable. |
Yesterday we were out on Lake Michigan in 2-3 seas with whitecaps and we caught a little bit of spray off the bow, but were perfectly dry otherwise. Honestly, I don't find the cockpit layout to be very comfortable for more than one or two people. But this may have more to do with how I have laid out the rigging.
The gaff yawl rig has a lot of strings to pull. I think it looks great. I think it sails just fine. But there's a LOT going on in the cockpit:
- Throat halyard
- Peak halyard
- Main sheet
- Port jib sheet
- St'bd jib sheet
- Jib furler
- Mizzen halyard
- Mizzen sheet
- Centerboard pennant
- Rudder uphaul
- Rudder downhaul
- Lazyjack/topping lift.
- Boom vang (not yet added).
That's a lot to single-hand. And because she's just a small boat, adding crew means slightly more confusion. In retrospect, I might have opted for a simpler rig.
So what have I modified since launch day?
1) I hinged the tiller. The way my tiller sits on the rudder, without a hinge, I couldn't get the rudder hard over because the tiller would bump into the coamings. A simple hinge, like the one Barrett Faneuf made solved the problem.
2) Mizzen rigging. I swapped out my mizzen sprit boom for a simple boom on a homemade gooseneck. For some reason, I could not figure out how to make a snotter give me the sail shape I wanted for the mizzen.
3) Electric motor. I originally carved a pair of oars, but found that this boat is not well-suited for efficient oar propulsion. Based on where I placed the oar locks, and my lack of a proper seat, and the fact that she's pretty beamy, meant that I had heavy 9.5' oars that were difficult to manage and worse to store onboard. I sucked it up and bought one of Minn Kota's new EO electric outboard motors and put it on one of Duckworks' transom mount engine brackets. I'm much happier with this arrangement, although it offends the purist in me. Now I can move to and from the dock and cruise through mooring fields at a comfy 5 kts. Supposedly, my 24v system will give 9 hours per charge. I haven't put that to the test.
4) Mainsail luff lacing. My hinged main mast means every time I raise the main, my lacing would get tangled or snagged on the hinge bolt. I replaced the lacing with polyprop/velcro webbing "mast hoops".
5) Lazy jacks. It seems like a lazy jacks on a small boat like this would be overkill. But given her gaff rig, without them it's almost impossible to lower the sail without having a disaster in the cockpit. I rigged a simple set of home-made jacks that also double as a topping lift.
6) I'm making a travel cover. Because I leave the boat almost completely rigged (except the mizzen), there's a lot of lines flopping around
Mods for this winter:
1) I need to reinforce the transom in the motor mount area. I hadn't planned on having a motor hanging off the back, so the 9mm transom ply feels like it's got a little too much flex.
2) I need to reconfigure my trailer to better suit the shape of the hull and give more over-the-road support.
3) I need to put a bicyble inner-tube "gasket" on the bottom of the hull where the centerboard slot is. I think this would keep water from splashing into the hull from the opening of the centerboard case.
4) I need to rethink the cam cleats. I'm not happy with them. A simple horn cleat I think is more secure and easier.
5) I need to re-visit how I've rigged my mainsheet. Right now, it's just in the way a lot of the time.
6) Add boom vang.
Launching day...
Two and a half years after beginning the project, the launch day arrived. Puffin was named and launched on June 5 on Lake Nagawicka, 30 miles west of Milwaukee, Wisconsin.
The day couldn't have been more beautiful. 75 degrees F., blue sky, a few puffy clouds, and steady winds 10-15. Nagawicka was chosen for a few reasons: First, and foremost, it's a generally shallow lake, so if we encountered any problems and Puffin sank, we'd be able to recover her relatively easily. Second, at 1,200 acres, it's a big enough lake to take Puffin for a decent spin around the block. Third, it's close to where we used to live, and so a few friends who watched her being built from day one would be able to participate on the big day. Last, I've spent many hours boating on this lake, so I know it and the launches pretty well.
 |
| Here's Puffin on her trailer, snugged down (as best we could) for the short drive over to Nagawicka. |
 |
| Different view. |
 |
| She floats!! Ignoring the sails being all ahoo, I was mostly concerned that she sat nicely on her waterlines, which in fact she does. |
 |
| Daughter Jane was the first person aboard. All grins and two thumbs up. No better praise for a proud dad. |
 |
| A small blessing, a brief presentation of Puffin to the gods, beseeching their protection, and a splash of prosecco (no Champagne at hand!) over the bow. |
 |
| For the first outing, we had no auxiliary power, so a friend gave us a tow out to the middle of the lake from his powerboat. We needed to practice getting the sails out. |
 |
| Raising the Gaff main. |
 |
All sails set, and off we go!   |
Catch up on the build...
OK. So new house out of the way. New shop finally set up. Winter come and gone. Spring (cold and soggy) behind us. Smack dab in the middle of summer. What's been happening with the boat??
I'm going to blast through this with a few pix and comments and jump to the conclusion because...
PUFFIN IS FINISHED!!
Well...as finished as any wooden boat ever will be. There's still stuff to do and I'm sure I will make modifications to what I've done so far once I get to sailing her. But...the hull is built, the rig has been rug, and she is ready to go get wet!
But...how did we get from my last substantial post, to where we are today? OK.
So I had just finished installing the decks. Then I got side tracked by making Joel Bergen's lovely wooden blocks. And then I got further side-tracked by learning how to splice rope. All of that was just a diversion from facing the fact that I would eventually have to put the dreaded coamings on. It turned out to be not so bad.
I decided to try my hand at carving a name board for Puffin. I spend some time on the road for my job, so I figured this could be something I could do while traveling. I feel sorry for the housekeeping person that had to clean up the pile of wood chips and dust I left behind at the Marriott Courtyard in La Crosse!
Almost done now. In keeping with the "Puffin" moniker, the outer hull is painted black and white. The rub rails are finished bright. I chose Grand Banks Beige for the deck and coaming. I think it looks very traditional and elegant.

I'm going to blast through this with a few pix and comments and jump to the conclusion because...
PUFFIN IS FINISHED!!
Well...as finished as any wooden boat ever will be. There's still stuff to do and I'm sure I will make modifications to what I've done so far once I get to sailing her. But...the hull is built, the rig has been rug, and she is ready to go get wet!
But...how did we get from my last substantial post, to where we are today? OK.
So I had just finished installing the decks. Then I got side tracked by making Joel Bergen's lovely wooden blocks. And then I got further side-tracked by learning how to splice rope. All of that was just a diversion from facing the fact that I would eventually have to put the dreaded coamings on. It turned out to be not so bad.
 |
| I figured this would be messy work, so I covered the insides with plastic to avoid gooping them up. Using jury-rigged clamping system to ensure that the transom coaming fit nicely into the correct angle and curve. Talk about a complicated little piece of wood! Two different curves cut on the X-Y axes, and a bend and cant angle on the Z axis. A lot of head-scratching for the boy who got D's in math at school. |
 |
| I used a combination of 9mm ply and laminations of 3mm ply for the half-circle at the front end of the cockpit. I've kept my coamings deliberately low. I wanted a bit of a back rest in the cockpit, but mostly just a splash-guard to keep deck water on the deck and not in the boat. |
 |
| Here you can see the final shaping of the transom coaming to match the curvature of the transom. |
 |
| Testing out the positioning of the oar locks. |
 |
| Blank basswood board on the Courtyard bed coverlet! 😝 |
 |
| Name sketched out |
 |
| Bas Relief carving. Lots more work to go on this piece. It's as far as I've gotten... |
Almost done now. In keeping with the "Puffin" moniker, the outer hull is painted black and white. The rub rails are finished bright. I chose Grand Banks Beige for the deck and coaming. I think it looks very traditional and elegant.

A few finishing details and we're almost ready for launch.
 |
| Carved brazilian cherry horn cleats are a nice contrast to the deck. |
 |
| Leathering of the various moving/chafing bits. Here is the mainmast partner on the foredeck. Note octagonal shape and bronze boat nails. Way back, I decided to keep the lower mainmast octagonal and then round it as it approaches the mast hinge. Unnecessary, but a nice little detail. |
 |
| Port side jib sheet comes through the coaming into a cam cleat. Oar locks mounted. Laid decks oiled with teak oil...even though it's really just white oak. |
 |
| General view of the inside of the boat. I think it looks nice with the bright white paint, oiled decks and beige coamings. |
Tuesday, May 31, 2016
Bet you thought I had given up!
It has been way too long. So long, that I bet you thought I had given up on the project. Ha! Not so fast there, partner. Part of the reason for the delay in posts is that life got very busy since last October. Not that it wasn't busy before. But it got WAY busy. The other part is that I like making boats more than I like blogging about it. :)
My last post was last October. That was 7 months ago! So what happened? You may recall we were building a new home in 2015. We finished that project and moved in last November.
Of course, there was a never-ending list of to-do's as there is with any new home.
Then, Winter came. Which was mercifully mild.
And thankfully, in the new home, my wife demanded that I quit messing up her garage, so we built a special heated garage bay, which is my boat-building shop. A few words about the shop:
Since starting this project in December of '13, I've decided this is my real hobby. There's almost nothing I enjoy more than spending a few hours doing "wood butchery". So it's especially nice to have a dedicated space for that; one that I can walk away in the middle of a task and not have to worry about cleaning everything up every instant. Also nice to not have every other thing in my garage covered with wood dust and epoxy drippings. We built this space with three large doors. on 3 of the walls, and two people-sized doors on the last wall. One people-door leads into the house. The other leads down to the basement, where I have a dedicated corner for long-term storage of stuff that I may use only sporadically. The three garage-size doors are each different. One is roll-up. One is a sliding barn-door. The last is a pair of swing-out doors. In the past two weeks, I've been able to work with two doors open to the outside. It's so pleasant to listen to the birds, feel a gentle breeze, have a cross-wind to clear the air of dust. I couldn't be happier. I had the concrete floor dropped in this space so that I could install a flush 3/4" ply work surface. It's nicer to walk on. It gives me places to nail things to the floor if needed. And as it gets destroyed over time, I could always, either re-sand, or reinstall a 8x4' panel as needed. Overhead, I had the builder install a recessed steel I-beam. The intent is that eventually I'll have a couple of hoists that can be used to flip hulls over, or perhaps even lift/install an aux engine into a boat...? I bought a few Home Cheapo cabinets and put a formica laminate top on one, and a plywood top on the other. The cabinets are nice for tool and supply storage, the tops give me additional work surfaces. I knocked up a couple of peg-board frames to organize hand tools, clamps, etc. There's a small sink in the corner with hot/cold water. Above that there are shelves for paint, thinners, varnish, and other goopy stuff in a can. A pair of Sonos speakers in the ceiling give me Wi-fi access to music and my beloved NPR. I did run cables for a TV...but really. Really? That feels a little sacrilegious. I want to say it's about an 18'x20' space, with maybe 25' on the longest diagonal. Just about perfect for a solo worker.
Anyway...all in all, a great new space to work.
Let me get this up, and then I'll fill you in on the current state of affairs with Puffin.
My last post was last October. That was 7 months ago! So what happened? You may recall we were building a new home in 2015. We finished that project and moved in last November.
 |
| First snow at the new house. |
Of course, there was a never-ending list of to-do's as there is with any new home.
Then, Winter came. Which was mercifully mild.
 |
| This was 1/2 hour of snowfall! |
Since starting this project in December of '13, I've decided this is my real hobby. There's almost nothing I enjoy more than spending a few hours doing "wood butchery". So it's especially nice to have a dedicated space for that; one that I can walk away in the middle of a task and not have to worry about cleaning everything up every instant. Also nice to not have every other thing in my garage covered with wood dust and epoxy drippings. We built this space with three large doors. on 3 of the walls, and two people-sized doors on the last wall. One people-door leads into the house. The other leads down to the basement, where I have a dedicated corner for long-term storage of stuff that I may use only sporadically. The three garage-size doors are each different. One is roll-up. One is a sliding barn-door. The last is a pair of swing-out doors. In the past two weeks, I've been able to work with two doors open to the outside. It's so pleasant to listen to the birds, feel a gentle breeze, have a cross-wind to clear the air of dust. I couldn't be happier. I had the concrete floor dropped in this space so that I could install a flush 3/4" ply work surface. It's nicer to walk on. It gives me places to nail things to the floor if needed. And as it gets destroyed over time, I could always, either re-sand, or reinstall a 8x4' panel as needed. Overhead, I had the builder install a recessed steel I-beam. The intent is that eventually I'll have a couple of hoists that can be used to flip hulls over, or perhaps even lift/install an aux engine into a boat...? I bought a few Home Cheapo cabinets and put a formica laminate top on one, and a plywood top on the other. The cabinets are nice for tool and supply storage, the tops give me additional work surfaces. I knocked up a couple of peg-board frames to organize hand tools, clamps, etc. There's a small sink in the corner with hot/cold water. Above that there are shelves for paint, thinners, varnish, and other goopy stuff in a can. A pair of Sonos speakers in the ceiling give me Wi-fi access to music and my beloved NPR. I did run cables for a TV...but really. Really? That feels a little sacrilegious. I want to say it's about an 18'x20' space, with maybe 25' on the longest diagonal. Just about perfect for a solo worker.
Anyway...all in all, a great new space to work.
 |
| Puffin jammed into the new work space on her trailer. The trailer is just a little much for in here. Especially since I don't have an articulating tongue. |
Tuesday, October 13, 2015
Beginning rope-work
So as I mentioned in an earlier post, I needed to take a little break from work on the hull and began fiddling with some of the other small parts. This past week, I decided to get moving on making the rig. I originally thought I would use yacht braid for the working lines and stainless wire for the standing lines. But the more I think about it, the more it seems like a traditional gaff rig should would probably look strange with anything other than traditional 3-strand.
Scrounging around online, I came up with a few bargain suppliers of rope and got myself three kinds: 1/4" amsteel for standing lines, and 1/4" and 3/8" vintage 3-strand for running lines. For the uninitiated, amsteel is a trade brand for high-modulus polyethylene rope (HMPE). The claim is that this rope is, diameter-for-diameter, stronger than steel, weighs less, is UV-stable, floats, and has very low stretch. Sounds perfect for standing rigging. The New England vintage 3-strand looks and feels like first-class manila rope, but has superior strength, lower stretch, and high durability when exposed to the elements. It has the added advantage of looking right on a traditionally rigged vessel.
Spools of line in hand, I return to the internet to find articles and you-tube videos about splicing different kinds of lines. Also, two books from Amazon are useful for the novice: Brion Toss' Rigger's Apprentice, and Barbara Merry's The Splicing Handbook.
Here are the fruits of my early labors:
Last but not least, I knocked out a few more wooden cleats. These are smaller (4"), and I will use them on the boom as terminals for reefing and mainsail clew, as well as on the mizzen for the halyard, spotter, and sheet.
Scrounging around online, I came up with a few bargain suppliers of rope and got myself three kinds: 1/4" amsteel for standing lines, and 1/4" and 3/8" vintage 3-strand for running lines. For the uninitiated, amsteel is a trade brand for high-modulus polyethylene rope (HMPE). The claim is that this rope is, diameter-for-diameter, stronger than steel, weighs less, is UV-stable, floats, and has very low stretch. Sounds perfect for standing rigging. The New England vintage 3-strand looks and feels like first-class manila rope, but has superior strength, lower stretch, and high durability when exposed to the elements. It has the added advantage of looking right on a traditionally rigged vessel.
Spools of line in hand, I return to the internet to find articles and you-tube videos about splicing different kinds of lines. Also, two books from Amazon are useful for the novice: Brion Toss' Rigger's Apprentice, and Barbara Merry's The Splicing Handbook.
Here are the fruits of my early labors:
 |
| Not the best picture in the world, but here's my bobstay. Two closed turnbuckles joined by a length of double eye-spliced amsteel with stainless thimbles. I think I might go back and re-do this with only one turnbuckle, although 2 gives me more adjustability... |
 |
| Detail of the turnbuckle attachment to the bowsprit. |
 |
| Here's the main-mast with side stays and the furled jib/forestay assembly. Side stays are am steel with a closed turnbuckle attached to the chainplates on the deck. At the hounds, I used a pair of stainless tangs. Again, thimbled eye-splices on both ends of the rope. You're probably wondering, what's going on with that deck coaming?? That's where I abandoned my hull work a couple of weeks ago. I'll get back to it soon... |
 |
| Here's detail of the turnbuckle for the side stay. |
 |
| Here's detail of the eye splice. I used waxed polyester twine to whip/serve the standing line. Probably overkill (like most of my work!) but it looks nice. |
 |
| Here's my first attempt at an eye-splice (with thimble) on the vintage 3-strand. Everyone says 3-strand is the easiest rope to splice. I have found it to be the most difficult so far. The amsteel in the photos above is hollow 12-strand, and is by far much simpler to splice. For the rope geeks among you, I know -- I should have 4 turns of tucks at least. Here I only have 3. Cut me a break, it's my practice piece. :) |
 |
| These have only been roughed out. Quarter shown for scale. I made these out of a piece of Lignum Vitae that I found. They'll be perfect for tying off 1/4" lines. By the way, I LOVE the smell of LV. It reminds me of lemon wood for some reason. |
Subscribe to:
Posts (Atom)